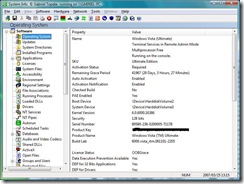
How To Create a FREE Password-Protected PDF

imageThis question comes up a lot:

I have the free Adobe Acrobat Reader, but not Acrobat Professional – can I still create a password-protected PDF?
I don’t feel like paying $360 for Acrobat Professional
just for the ability to do encryption or password protection.

The short answer is ‘yes’, but you’ll need another program to do it.

I recommend the FREE open source program PDF Creator 0.9.8 (16.8 MB).

Below are detailed instructions you can share with your employees and clients:
– (Part A) PDF Creator program installation instructions
– (Part B) Creating the password-protected and encrypted PDFs
– (Part C) PDF opening instructions

PART A – PDF CREATOR INSTALLATION (Boring Part)

  1. Download PDF Creator 0.9.8 from SourceForge
    http://sourceforge.net/projects/pdfcreator/
  2. Double-click the PDFCreator-0_9_8_setup.exe file and choose Run.
    Choose Run
    (If User Account Control pops up in Vista or Windows 7, click Allow)
  3. Select your language (English) and click OK.
    Pick English and click OK
  4. When the setup Wizard launches, click Next.
    Setup - Click Next
  5. Accept the license agreement, and click Next.
    Accept the license agreement - click Next
  6. For Type of Installation, choose Standard installation, and click Next.
    Standard Installation - click Next
  7. For Printer name accept the default of “PDFCreator”, and click Next.
    Printer Name - click Next
  8. On Select Destination Location, accept the default and click Next.
    Default Installation Path - click Next
  9. The installation will install the PDFCreator Browser Add On (annoying) but you can later uninstall via the Control Panel.
    Uncheck “Yahoo!” and click Next.
    Uncheck Yahoo - click Next.
  10. Under Select Components, accept the defaults and click Next.
    Components - click Next
  11. On Select Start Menu Folder accept the default and click Next.
    Start Menu - click Next
  12. On Select Additional Tasks accept the defaults and click Next.
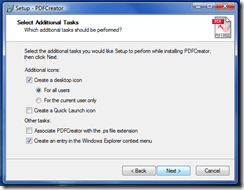
    Additional Tasks - click Next
  13. And then click Install and click Finish when the installation is complete.
    Ready - click Install then click Finish

Now that the PDF Creator program is installed, it’s time to convert a file into a password-protected PDF.

PART B – CREATING A PASSWORD-PROTECTED PDFs
(Interesting Part)

  1. Make sure the document that you want to convert is CLOSED.
  2. Right-click the icon of the document you want to convert, and choose
    Create PDF and Bitmap Files with PDFCreator from the pop-up.
    Right-click document, click Create PDF
  3. At the “It is necessary to temporarily set PDFCreator as defaultprinter” prompt click Don’t ask me again checkbox and click OK.
    Click Don't ask me again - click OK
  4. The document will open and then close again, and you will be left with a PDFCreator 0.9.8 dialog box, as shown below.Click the Options button.
    Click Options
  5. On the Options page, expand the Formats tab on the left.
    Expand Formats tab
  6. Click the PDF icon on the left, click the Security tab on the right, and check the Use Security checkbox.
    Click PDF, click Security tab, click Use Security
  7. Choose the following:
    – Encryption level (40-bit or 128-bit)
    – Password to open (user password)
    – Password to change permissions (owner password)
    – Any other user restrictions you want to set
    Pick encryption and password levels, click Save twice
  8. Hit Save on the bottom right of the Options page, and then Save again on the main PDFCreator 0.9.8 page (seen in Step 4 above).
  9. When the Save as dialog box comes up, give the file a name and
    click Save.
    Pick a file name and location - click Save
  10. PDF Creator will pop-up a small animated splash screen…image

    …and prompt you for the password you want to use to create your document. Enter the password twice and click OK.

    Pick a password - click OK

  11. If you leave the ‘Owner Password’ blank (which fine if you want to) you will get an additional dialog box letting you know that it’s blank. For more on PDF handling, read this post about whiting out a pdf document.
    Optional screen - only happens when Owner Password is blank
    Click Yes to leave the Owner Password blank, or click No to go back and add an Owner Password.
  12. Once the document is saved, it immediately tries to open in your preferred PDF reader (I use Foxit Reader) and prompts your for a password. Type the User Password and click OK.
    Enter password - click OK
  13. You should now be able to see your password-protected PDF.
    You're done dude!

Congratulations – That’s a few hoops to jump through! 🙂

PART C – WHAT THE CLIENT / RECIPIENT SEES
(The most important part)

  1. E-mail them the password-protected PDF document
  2. They open the attachment and get prompted for a password
    Enter password - click OK
  3. Once they enter the password and click OK, the PDF opens.

RECAP

  • Part A is just a one-time thing.
  • Part B is every time you want to CREATE a password-protected PDF
  • Part C is what the client (recipient) and does each time they want to OPEN the protected PDF.
VN:F [1.9.20_1166]
Rating: 9.8/10 (10 votes cast)

SBS 2008 Unleashed Book

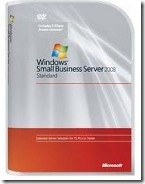
SBS 2008 box shot standard edition Back in 2005 I was privileged to be one of the co-authors of “Microsoft Small Business Server 2003 Unleashed”. As I’m sure most authors can attest, working on a book is a very unique and eye-opening experience.  It takes a lot of time, work, testing, research and commitment to crank out a book, but in the end you have something tangible to show for all the effort. You make some great friends and learn something about yourself along the way too.

Then we skip forward several years and Eriq Neale invited me to be one the co-authors once again. This time the book was titled “Windows Small Business Server 2008 Unleashed.” I looked at the calendar and figured, “Wow, this is really awesome. We’ve got *tons* of time – the operating system isn’t even baked yet!” So I signed on. Interestingly, time moves quickly. Very, VERY quickly. And as SBS 2008 got closer to being finished and as work on the book continued, it seemed like every movie on TV was about an author with looming publishing deadlines or writer’s block like Duplex or Stranger Than Fiction. No pressure. 😉

At any rate, as the book project moved along, you could really see it transform slowly from an idea, into an outline, to a rough draft, through revisions, technical and grammatical editing, screen shots, page layouts, and eventually all the way into a finished book. And while you’re writing and doing testing and research, the software itself (code named “Cougar”) changes. It goes through various builds, into private and public betas, Release Candidates and eventually it becomes the final RTM code for SBS 2008. Believe me, it’s a pretty long trip!

So, the writing has been done for a while, and now comes the waiting part. The book is being printed and shipped, but I haven’t held a hard copy in my hands yet. And today it was cool to get an email from Amazon.com that really hit home:

Windows Small Business Server 2008 Unleashed

All of the sudden the book seems much more real. 🙂

Getting to this stage was a group effort, and I was just one person in a large team of folks that made this project happen. The whole team worked really hard through deadlines, daily responsibilities, lots of writing and zillions of emails.

The writers of this book include:

And here’s what’s in the book:

Table of Contents:

  1. Welcome to Small Business Server 2008
  2. Planning for the SBS 2008 Deployment
  3. Installing and Configuring SBS 2008
  4. DNS, DHCP, and Active Directory Integration
  5. Internet Information Services 7.0
  6. Remote Web Workplace and Other Remote Access Solutions
  7. SharePoint and Companyweb
  8. Exchange Management
  9. Exchange 2007 Client Connectivity
  10. Exchange Disaster Recovery
  11. Group Policy in SBS 2008
  12. User and Computer Management
  13. Macintosh Integration
  14. Additional Servers
  15. Managing Workstations Through Group Policy
  16. Monitoring and Reporting
  17. Managing Server and Workstation Security
  18. Backup and Disaster Recovery
  19. IPv6 Overview
  20. PowerShell
  21. Advanced Installation Options

Windows Small Business Server 2008 UnleashedI’m sure I speak for everyone on the writing, editing and publishing teams when I say that we’re really proud of this book! And I’d like to send a special “thank you” to Eriq Neale and Acquisitions Editor Loretta Yates for letting me be on the team again,
and for not killing me when they wanted to. 😉

We look forward to seeing the book hit the shelves and we’re certain that it will help people understand and support this amazing new operating system.

I hope you enjoy it!

Title: Windows Small Business Server 2008 Unleashed
Publisher: Sams Publishing; 1 edition (December 6, 2008)
ISBN-10: 0672329573
Paperback: 816 pages
Language: English
Amazon | Barnes & Noble | Buy.com | InformIT / Sams

VN:F [1.9.20_1166]
Rating: 0.0/10 (0 votes cast)

Hacks – DD-WRT Firmware Presentation

Thanks everyone who attended the KYSBSUG presentation on modding your wireless router with the DD-WRT firmware!

Here are the show notes from tonight. P.S. Don’t forget to reset your wired NIC TCP/IP settings back to automatic after you’re done flashing your router. 🙂

If I don’t see you at SMB Nation in Seattle next week, I’ll see you at the Oct KYSBSUG meeting (tentative date Wed Oct 15, 2008).

VN:F [1.9.20_1166]
Rating: 0.0/10 (0 votes cast)

Whitepaper – Deploying WM6 on SBS 2003

Windows Mobile 6 Whitepaper Title: Deploying Windows Mobile 6 with Windows Small Business Server 2003
File Name: SBS-WM6_122107.doc
Version: 3.0
Date Published: January 2008
Language: English
Download Size: 1.8 MB
Pages:  49
Download URL: Click here

Description:
Do you want to add Windows Mobile devices to your network? Is your network based either on the Windows Small Business Server 2003 (Windows SBS) server software with Service Pack 1 (SP1) or on Windows Small Business Server 2003 R2? If so, you can use the step-by-step instructions in this document to deploy devices that are powered by the Windows Mobile 6 software on a Windows SBS network.

Contents

  • Step 1: Install ActiveSync 4.5 or WMDC 6.1
  • Step 2: Enable Mobile Services for Users
  • Step 3: Configure the Firewall and Web Services
  • Step 4: Install a Certificate
  • Step 5: Configure Windows Small Business Server
  • Step 6: Configure Device Synchronization
  • Step 7: Test the Deployment

Source: Sean Daniel’s blog

VN:F [1.9.20_1166]
Rating: 0.0/10 (0 votes cast)

KYSBSUG Feb 2008 – Windows Mobile Hands-On Lab

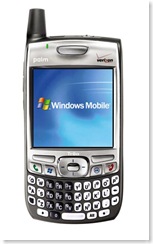
windows_mobile_palm_treo Are you interested in setting up a Windows Mobile device with SBS, but just haven’t gotten around to doing it?

If so, you’re not alone.  Next to Windows SharePoint Services, Windows Mobile devices are the most under-used killer technology in SBS.

This month our topic for the KYSBSUG meeting is a free hands-on lab / boot camp to get IT Pros and network administrators comfortable with testing, rolling out, and supporting Windows Mobile devices with SBS.

In addition to offering training on Windows Mobile 5 & 6, we’ll also provide resources for connecting Palm mobile devices (such as the new Palm Centro) and Apple iPhones with SBS. 

If you’re shy and have never used Windows Mobile devices before, this event is for you! We’ll take you from a-to-sync. 🙂  Or, if you’re already are a Windows Mobile pro, you’re still invited to attend, compare notes on local wireless carriers, help users with the labs, and be registered for the door prizes.

You are invited to register and attend in person!
Cost:  FREE

Event: KYSBSUG February 2008 Meeting (#47)
Topic: Windows Mobile Hands-On Lab / Boot Camp
Date: Wed Feb 20, 2008
Time: 6:30 PM Eastern – 9:00 PM Eastern
Location: Money Concepts
Address: 323 Townepark Circle
City St Zip: Louisville, KY 40243
Registration Required?: Yes
Invitees: IT Pros, Network Administrators, KYSBSUG Members & Geeks
Registration URL: http://www.clicktoattend.com/?id=125230

Below is a list of what you’ll need to complete the lab.

Note: If you’re missing any of the pieces below to complete the lab, don’t worry. You’re still invited to attend to receive a copy of the simulator software and to see what pieces you need to put in place to properly configure a Windows Mobile device on your (or your customer’s) network. Just be sure to bring a flash drive.

IMPORTANT – You DO NOT need to have a Pocket PC or SmartPhone to complete this lab. We will provide attendees with a Windows Mobile emulator that runs on your PC. (We also have a Palm emulator as well).

To complete the lab you will need:

  • Laptop PC (Vista or XP) with WiFi
  • 1 GB of RAM
  • 1-1.5 GB available hard drive space
  • Remote access to an SBS server with RWW properly configured (CEICW already run & ports open in your firewall)
  • An ‘A’ record pointing to your RWW site (such as remote.domain.com or server.domain.com)
  • Administrator credentials for your SBS server
  • AC powerstrip / surge protector or extension cord
  • 1 GB or larger USB flash drive

OPTIONAL – If you DO decide to bring a SmartPhone or Pocket PC, please also bring:

  • Your Windows Mobile device
  • The charger / AC adapter
  • The data cable / cradle
  • Any software (CDs) that came with the phone
  • An SD / Mini SD / Micro SD card (whatever your device takes)
  • A card reader or adapter to read the SD card on your PC

There is already a lot of interest in this topic and seating is limited, so please register early to guarantee a seat.

VN:F [1.9.20_1166]
Rating: 0.0/10 (0 votes cast)

Windows Mobile 6 Customer Improvement Program

imageWhile troubleshooting Exchange Active Sync for a client today, I spun up a WM6 virtual Pocket PC to test the certificate & server settings. After troubleshooting was complete, I noticed a pop-up for the Customer Experience Improvement Program.

For most folks with WM6 this is a big ‘whoop-dee-doo’, but since I’m still on WM5 with my personal Pocket PC, I was kind of surprised to see this message.

Anyway, these pre-built Windows Mobile 6 virtual Pocket PC devices are really awesome for training and troubleshooting: 

  • Windows Mobile 6 Professional Images (USA).msi (183 MB)
  • Windows Mobile 6 Standard Images (USA).msi (73 MB)

You can download them for FREE: click here

Note: To connect the WM6 VPCs to your existing Network Interface Card, you should also download either the Virtual Machine Network Driver for Microsoft Device Emulator (1KB) or Microsoft Virtual PC 2007 (30.4 MB). Virtual PC has the VM network driver baked in.

VN:F [1.9.20_1166]
Rating: 0.0/10 (0 votes cast)

Video – Seam Carving and Liquid Rescale

Seam carving is one of those new technologies that you have to see to understand.  I’ve heard this called “content-aware image resizing”, “retargeting” “rescaling”, etc., and those names fall flat. 

You really need to see this – it’s just too cool to even try to describe:

Pretty nice, eh? Wanna try it yourself?

Here are 3 examples of what you can easily do with GIMP and the Liquid Rescale plug-in.

EXAMPLE 1 – Reduce Overall 25% – Mythbusters

Before (500×375 pixels)

image

During (showing the Liquid Rescale plug-in)

image

After (375×281) –  look at how much white space we lost on the top and sides of the picture. But the aspect ratio remained the same, even though Adam is a little thinner in the after picture:

image

That doesn’t look significant, but look how much picture we would have lost to conventional cropping using Microsoft Office Picture Manager (the hands would be gone completely):

image

EXAMPLE 2 – Reduce Width Only by 25% – Seagull in Seattle

Before (2272×1074)

image

After (1074×1074) -25% width

image

After v2 (2840×1278) +25% width, -25% height

image

Note: These pictures were not rescale or cropped – it’s a ‘retarget’.

EXAMPLE 3 – Reduce Height Only by 25% – Susanne & Vlad

Before (1024×768)

image

After (1024×576) -25% height

image

Once again, not a crop… yada yada… you get the idea.  It’s lots of fun. Enjoy!

Dr. Codec 🙂

VN:F [1.9.20_1166]
Rating: 0.0/10 (0 votes cast)

Download – Selling SBS and WSS Kit

wss_logo Title: How to Sell, Deploy, and Build Business with Microsoft Windows Sharepoint Services 3.0 and SBS 2003 R2
File Name: Selling_WSS_and_SBS_Kit.zip
Version: 1.0
Date Published: 11/15/2007
Language: English
Download Size: 3.2 MB
Download URL: Click here

Description: 
A new partner enablement tool that helps you create solutions using Windows SharePoint Services 3.0 and Windows Small Business Server 2003 R2. Access the toolkit’s resources—including a process cookbook, technical documentation and marketing materials—to learn how to build your business by selling and deploying customized solutions.

Contents Include:

  • Application Templates Overview for WSS v3
  • Asking the Client to Agree to a WSS Demo Final.doc
  • Helpful Technical Resources from Microsoft.doc
  • Identifying Potential WSS Clients.doc
  • Making WSS into a Secure Extranet.doc*
  • Preparing Your Business to Sell and Support WSS.doc
  • SBS Business Benefits Highlights.doc
  • SharePointBackups.exe
  • Site Administrator Homework Sample.doc
  • Visio Windows SharePoint Process Flows 061107.pdf
  • WSS 3.0 User Training Guide.doc
  • WSS 3.0 Admin Training Guide.doc
  • WSS 3.0 Site Demonstration Script.doc
  • WSS 3.0 Site Intake Template Starter Site.doc
  • WSS 3.0 Technical Setup.doc
  • WSS Admin Training Agenda Sample.doc
  • WSS Future Opportunities.doc
  • WSS Packaged Offering StarterSite Sample.doc
  • WSS Process Flow Steps Documents Objectives Toolkit Readiness.xls
  • WSS StarterSite Intake Template.doc
  • WSS User Training Agenda Sample.doc
  • Your Ideal Pilot Client.doc

*If you’re looking for the document on creating a secure extranet using WSS v3 on top of SBS, it’s in this download.  This is the same WSS / SBS content released at Worldwide Partner Conference 2007 that everyone has been asking for over the last several months.  Basically, this stuff is a gold mine!

VN:F [1.9.20_1166]
Rating: 0.0/10 (0 votes cast)

Notes from November 2007 KYSBSUG Meeting

kysbsug Thanks to everyone who attended the November 2007 Kentucky Small Business Server User Group (KYSBSUG) meeting last night on "Best Practices".

SPECIAL THANKS:

  • Thanks to all who attended, especially those traveling from Lexington.
  • Also, MAJOR thanks to Matthew Snoddy from Network Therapists for presenting!  We’re really looking forward to the Lexington SBS group launch in January!
  • And thanks to those who stayed after to attend the WHS build

GRAND PRIZE WINNER:

  • Windows Home Server Lee Johnson from Sentry Computer Systems took home the copy of Windows Home Server
    Congratulations Lee on finally winning something 😉

URLS MENTIONED LAST NIGHT:

  • SBS 2003 Best Practices Analyzer v1.3 (1.1 MB)
  • Exchange 2003 Best Practices Analyzer v2.8 (6.8 MB)
  • ISA 2004 Best Practices Analyzer v5.5 (2.8 MB)
  • WSS v3 & MOSS 2007 Best Practices Analyzer (1.4 MB)
  • Microsoft Baseline Security Analyzer v2.1 – Beta 2 (1.3 MB)
  • Visio 2007 Connector for MBSA 2.1 (1.1 MB)
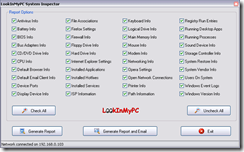
  • lookinmypc LookInMyPC (1.2 MB) – LookInMyPC generates a complete, comprehensive system profile that includes information on all installed hardware and software. Additionally it provides system diagnostic information such as details on running processes, installed services, startup programs, Windows updates and hot fixes, active network and Internet connections, TCP/IP port usage, event log detail, and much more. All this is provided in an easy to read, formatted report that you can view and print using your web browser.
  • AccessEnum v1.32 (51 KB) – AccessEnum gives you a full view of your file system and Registry security settings in seconds, making it the ideal tool for helping you for security holes and lock down permissions where necessary.
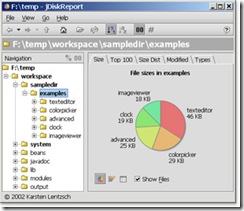
  • JDiskReport JDiskReport v1.3 (0.6 MB) – JDiskReport enables you to understand how much space the files and directories consume on your disk drives, and it helps you find obsolete files and folders.

    The tool analyses your disk drives and collects several statistics which you can view as overview charts and details tables.

    This is ad-free uncrippled no-charge binary multi-platform software that never expires.  (Requires Java).

  • The Dude 2.2 The Dude v2.2 (1.8 MB)  – The Dude is a network monitor that will enable you to scan all the devices within a network subnet and then draw a map of the network devices and tell you where your workstations are connected and warn you of service problems.

    Better still, your network doesn’t need to be internal. If your company has a network between offices, The Dude will enable you to map the entire network.

  • PsEXec v1.9 (1 MB) – PsExec, from Microsoft / Sysinternals is a light-weight telnet-replacement that lets you execute processes on other systems, complete with full interactivity for console applications, without having to manually install client software. PsExec’s most powerful uses include launching interactive command-prompts on remote systems and remote-enabling tools like IpConfig that otherwise do not have the ability to show information about remote systems.

    Note: some anti-virus scanners report that one or more of the tools are infected with a "remote admin" virus. None of the PsTools contain viruses, but they have been used by viruses, which is why they trigger virus notifications.

  • SIW - System Information for Windows System Information for Windows (SIW) v1.71 (1.3 MB) – SIW is an advanced System Information for Windows tool that gathers detailed information about your system properties and settings and displays it in an extremely comprehensible manner.

    This standalone utility does not require installation (Portable Freeware) – one less installed program on your PC as well the fact that you can run the program directly from an USB flash drive, from a floppy, from a network drive or from a domain login script.

VN:F [1.9.20_1166]
Rating: 0.0/10 (0 votes cast)

Installing WSS v3 on a Member Server in an SBS Network

Windows SharePoint ServicesIf you’ve got a member server in your SBS network (especially if that server is a beefy SQL box) it may make sense from a performance standpoint to install Windows SharePoint Services version 3 on the member server instead of directly on the SBS box.  This is actually a pretty straight-forward process, but in case you’re not totally comfortable with WSS v3 yet, the procedure is documented below using a combination of a Microsoft e-book and the WSS on SBS instructions Chad came up with for SBS. 

Note:  This free WSS v3 e-book is NOT the whitepaper Chad mentions in his article.  This is a digital book: "Deployment for Windows SharePoint Services 3.0 Technology". (189 pages – published May 2007)

There are two downloads on the page (the second is for an upgrade scenario).  Choose the first install (1.1 MB).

Once you’ve downloaded the Deployment e-book, jump to page 23:

  1. Install Internet Information Server (IIS) 6.0 from the Windows Server 2003 CD 1.
  2. Disable "Run WWW server in IIS 5.0 isolation mode"
  3. Install .NET 3.0
  4. Enable ASP.NET v2.0.50727
  5. Install WSS v3

    (Select Advanced Install, Select Stand-Alone server type, Choose your data location)

  6. Run the SharePoint Products and Technologies Configuration Wizard.

    (This may require a restart of the services IIS, SharePoint Administration Service and SharePoint Timer Service.)

  7. The default web site will be http://servername/default.aspx
    Credentials to access the site should be in the format DOMAIN\user_name and the normal domain password.

    >>This is where we switch from the Microsoft e-book to Chad Gross’ "Companyweb & SharePoint v3 – Part 4" instructions <<

  8. Following Chad’s original instructions in WSS v3 Part 4, starting with "(insert cheesy on hold music . . . )"

    Login to the SBS server and create the new Host (A) record for http://intranet that points to the private IP address of your member server, and be sure to create the associated pointer (PRT) record.

  9. Follow the rest of Chad’s instructions on that page to extend the default site to http://intranet (you may have to delete the ":80" port from the URL at the bottom of the configuration page so the final URL is http://intranet and not http://intranet:80)

    >> Now leaving Chad’s instructions <<
     

  10. If you refresh IIS you’ll notice that the SharePoint – 80 default site is gone.  However, your old "Default Web Site" (the http://servername) is still there.
  11. Right-click the Default Web Site, click Properties, click the Home Directory tab, select the "A redirection to a URL" radio button, in the ‘Redirect to:’ text box type "http//intranet". Click OK.

    image

  12. Right-click the Default Web Site and start it.
  13. Now http://servername and http://intranet should both take you to http://intranet (be sure to test it from your SBS box as well).  If the link isn’t working, make sure you flushed your DNS cache in step 8 above.
  14. Login to your http://intranet site, click Site Actions / Site Settings / Title, description, and icon / rename your site "Intranet"
  15. Download and deploy your templates from the Fabulous 40 collection. Be sure to read the readme.txt enclosed in that download.
  16. Last, but certainly not least – BACKUP!!

    Chad mentions backing up your old WSS v2 http://companyweb site in Part 3, but the stsadm for WSS v3 is located in a different position, namely:

    – WSS v2 uses ..\60\bin
    – WSS v3 uses ..\12\bin

    The command I use to backup the WSS v3 http://intranet test site is shown below (yours will vary depending on the target location of your backup files):

Start / Run / CMD / Enter

CD C:\Program Files\Common Files\Microsoft Shared\web server extensions\12\bin <Enter>

stsadm.exe -o backup -url http://intranet -filename "E:\WSSv3Backup\intranet_backup.dat" -overwrite <Enter>

Of course, you can use the system timer to schedule that backup daily if you like. 

Once you get past getting your feet wet with WSS v3, be sure to check out the section, "Administering backup and recovery for Windows SharePoint Services 3.0 technology" on TechNet (especially if you’re running SQL as your database engine) before rolling out WSS to client sites.

VN:F [1.9.20_1166]
Rating: 0.0/10 (0 votes cast)