Webcasts – Get Your MS Virtualization Learn On

Nowadays you can’t swing a dead cat without hitting someone who’s talking about virtualization. I’m guessing that your technicians are up-to-speed with virtualization, but are your sales folks?

Webcast screen shot Microsoft has a great series of webcasts for Microsoft Partners to give them the basics of virtualization with the following 4-part (6 segment) series with Ronald Grattopp and Bryan Von Axelson:

The Ultimate Sales Guide to Microsoft Virtualization

Note: You must have a Microsoft Partner ID linked with your Windows Live ID and sign in to view these webcasts.

Link to Desktop Virtualization sweepstakes Microsoft Desktop Virtualization Sweepstakes

In addition to some great (and free) information, Microsoft is providing an incentive for Microsoft Partners to attend these trainings. They are giving away:

  • Two (2) HP EX90 MediaSmart Servers
  • Eight (8) Sony Touch Readers

Webcasts in bold above are eligible for the Desktop Virtualization Sweepstakes. Sweepstakes ends April 12, 2010. See official website for details.

You can also stop by the Microsoft Virtualization portal:
http://www.microsoft.com/virtualization

VN:F [1.9.20_1166]
Rating: 0.0/10 (0 votes cast)

KYSBSUG Meeting #71 – Passwords

Invitation – January 2010 KYSBSUG Meeting #71
Meeting Date: Wednesday January 20, 2010
Time: 6:30 PM Eastern
Location: Money Concepts
Address: 323 Townpark Circle, Suite 100, Louisville, KY 40243
Topic: “Password Security and Password Cracking

Dana Epp - Microsoft MVP Guest Presenter: Dana Epp, MVP (Enterprise Security)
Founder & President of Scorpion Software (makers of AuthAnvil)

Website: http://www.scorpionsoft.com/
MVP: https://mvp.support.microsoft.com/profile/Dana.Epp
Blog: http://silverstr.ufies.org/blog/

Description: Dana Epp is an industry-recognized expert in security and Microsoft MVP (2006-2010). Dana will talk about local and remote password security in SBS and SMB networks. He’ll also talk about topics such as two-factor authentication and tell you how you can implement this technology for your employees and customers.

Following Dana’s presentation, we’ll have a hands-on lab to demonstrate some of the tools on the market and methods to test (and break) passwords.

6:30 – 6:45 – Local events & introductions
6:45 – 7:30 – Dana Epp presentation (via GoToMeeting)
7:30 – 7:45 – Dana Q&A
7:45 – 8:20 – Hands-on Lab
8:20 – 8:30 – Door prize drawing and wrap-up

Door Prize: This month our door prize is an NFR copy of Windows 7 Ultimate.

VN:F [1.9.20_1166]
Rating: 0.0/10 (0 votes cast)

More Windows 7 God Mode Hacks

Inspired by the cool findings on CNET regarding the Windows 7 ‘God Mode’ (as bloggers are calling it), and yet another post about additional features, I did some more digging to see what other options I could find.

First, the actual name for ‘God Mode’ is (anticlimactically) “All Tasks”:

Control Panel entry for All Tasks

I then did a search in the registry and found 39 more items I could use to create folders / shortcuts.

39 custom-created Control Panel shortcuts

They’re located under Computer\HKEY_CLASSES_ROOT\CSLID\
Most, but not all, of them have a REG_SZ key for “System.Software.TasksFileURL” which is set to “Internal”.
Registry key for System.Software.TasksFileURL

Here’s the list of registry keys / shortcuts that worked for me. Just create a new blank folder in Windows Explorer and give it one of the names below:

Action Center CPL.{BB64F8A7-BEE7-4E1A-AB8D-7D8273F7FDB6}
Administrative Tools.{D20EA4E1-3957-11d2-A40B-0C5020524153}
AutoPlay.{9C60DE1E-E5FC-40f4-A487-460851A8D915}
Backup and Restore.{B98A2BEA-7D42-4558-8BD1-832F41BAC6FD}
Biometrics.{0142e4d0-fb7a-11dc-ba4a-000ffe7ab428}
Computer.{20D04FE0-3AEA-1069-A2D8-08002B30309D}
Credential Manager.{1206F5F1-0569-412C-8FEC-3204630DFB70}
Default Location.{00C6D95F-329C-409a-81D7-C46C66EA7F33}
Device Center.{A8A91A66-3A7D-4424-8D24-04E180695C7A}
Display.{C555438B-3C23-4769-A71F-B6D3D9B6053A}
Ease of Access.{D555645E-D4F8-4c29-A827-D93C859C4F2A}
GodMode.{ED7BA470-8E54-465E-825C-99712043E01C}
HomeGroup Control Panel.{67CA7650-96E6-4FDD-BB43-A8E774F73A57}
Install New Programs.{15eae92e-f17a-4431-9f28-805e482dafd4}
Location.{00C6D95F-329C-409a-81D7-C46C66EA7F33}
Manage Wireless Networks.{1FA9085F-25A2-489B-85D4-86326EEDCD87}
Microsoft Windows Font Folder.{BD84B380-8CA2-1069-AB1D-08000948F534}
Network and Sharing Center.{8E908FC9-BECC-40f6-915B-F4CA0E70D03D}
Network Map.{E7DE9B1A-7533-4556-9484-B26FB486475E}
Network.{208D2C60-3AEA-1069-A2D7-08002B30309D}
Parental Controls.{96AE8D84-A250-4520-95A5-A47A7E3C548B}
Performance Information and Tools.{78F3955E-3B90-4184-BD14-5397C15F1EFC}
Personalization Control Panel.{ED834ED6-4B5A-4bfe-8F11-A626DCB6A921}
Power Options.{025A5937-A6BE-4686-A844-36FE4BEC8B6D}
Printers.{2227A280-3AEA-1069-A2DE-08002B30309D}
Programs and Features.{7b81be6a-ce2b-4676-a29e-eb907a5126c5}
Public Keys.{1D2680C9-0E2A-469d-B787-065558BC7D43}
Secure Startup.{D9EF8727-CAC2-4e60-809E-86F80A666C91}
Sensors.{E9950154-C418-419e-A90A-20C5287AE24B}
Set User Defaults.{17cd9488-1228-4b2f-88ce-4298e93e0966}
Speech Recognition.{58E3C745-D971-4081-9034-86E34B30836A}
Sync Center Folder.{9C73F5E5-7AE7-4E32-A8E8-8D23B85255BF}
System Recovery.{9FE63AFD-59CF-4419-9775-ABCC3849F861}
System.{BB06C0E4-D293-4f75-8A90-CB05B6477EEE}
Taskbar Icons.{05d7b0f4-2121-4eff-bf6b-ed3f69b894d9}
Troubleshooting.{C58C4893-3BE0-4B45-ABB5-A63E4B8C8651}
User Accounts.{60632754-c523-4b62-b45c-4172da012619}
Windows Firewall.{4026492F-2F69-46B8-B9BF-5654FC07E423}
Windows Update.{36eef7db-88ad-4e81-ad49-0e313f0c35f8}
Workspaces Center.{241D7C96-F8BF-4F85-B01F-E2B043341A4B}

I also found a bunch of registry keys for control panel items that I didn’t work for creating functional folder shortcuts (22 of them). Here’s that list, in case somebody knows how to make them work:

CardSpace.{78CB147A-98EA-4AA6-B0DF-C8681F69341C}
Color Management.{B2C761C6-29BC-4f19-9251-E6195265BAF1}
Date and Time Control Panel.{E2E7934B-DCE5-43C4-9576-7FE4F75E7480}
Device Manager.{74246bfc-4c96-11d0-abef-0020af6b0b7a}
Folder Options.{6DFD7C5C-2451-11d3-A299-00C04F8EF6AF}
Getting Started.{CB1B7F8C-C50A-4176-B604-9E24DEE8D4D1}
Indexing Options Control Panel.{87D66A43-7B11-4A28-9811-C86EE395ACF7}
Infrared.{A0275511-0E86-4ECA-97C2-ECD8F1221D08}
Internet Options.{A3DD4F92-658A-410F-84FD-6FBBBEF2FFFE}
Keyboard Control Panel
.{725BE8F7-668E-4C7B-8F90-46BDB0936430}
Mobility Center Control Panel.{5ea4f148-308c-46d7-98a9-49041b1dd468}
Mouse Control Panel.{6C8EEC18-8D75-41B2-A177-8831D59D2D50}
Pen and Touch Control Panel.{F82DF8F7-8B9F-442E-A48C-818EA735FF9B}
Phone and Modem Control Panel.{40419485-C444-4567-851A-2DD7BFA1684D}
Region and Language.{62D8ED13-C9D0-4CE8-A914-47DD628FB1B0}
Sound Control Panel.{F2DDFC82-8F12-4CDD-B7DC-D4FE1425AA4D}
Tablet PC Settings Control Panel.{80F3F1D5-FECA-45F3-BC32-752C152E456E}
Taskbar and Start Menu.{0DF44EAA-FF21-4412-828E-260A8728E7F1}
Text to Speech Control Panel.{D17D1D6D-CC3F-4815-8FE3-607E7D5D10B3}
Windows Defender.{D8559EB9-20C0-410E-BEDA-7ED416AECC2A}
Windows Sidebar Properties.{37efd44d-ef8d-41b1-940d-96973a50e9e0}
Windows SideShow.{E95A4861-D57A-4be1-AD0F-35267E261739}

As a workaround for the items in the second list, you can just navigate to the item, right-click it and choose “Create Shortcut”.

Creating a shortcut for Control Panel items

This will place a shortcut on your desktop that you can then move where ever you like. It’s a shortcut…

image

…but it works.

VN:F [1.9.20_1166]
Rating: 0.0/10 (0 votes cast)

Windows 7 ‘God Mode’ Hack

If you hate looking all over the control panel in Windows 7 for where Microsoft moved your favorite icon, you’ll love the “God Mode” hack. I found this on CNET.

Basically, you open Windows Explorer, navigate to the C: drive, create a new blank folder in Windows 7 and give it the following name:

GodMode.{ED7BA470-8E54-465E-825C-99712043E01C}

The folder icon changes automatically and you’ve got the ‘God Mode’ menu.

God Mode in Windows 7

Double-click that icon and you have one menu with about 275-295 menu choices (depending on the hardware and windows features installed) broken into the following categories:

  • Action Center (15 items)
     Action Center
  • Administrative Tools (10 items)
     Administrative Tools
  • AutoPlay (3 items)
     AutoPlay
  • Backup and Restore (2 items)
     Backup and Restore
  • BitLocker Drive Encryption (2 items – if you have BitLocker installed)
     BitLocker Drive Encryption
  • Color Management (1 item)
     Color Management
  • Credential Manager (1 item) 
    Credential Manager
  • Date and Time (4 items)
    Data and Time
  • Default Programs (2 items)
    Default Programs
  • Desktop Gadgets (6 items)
    Desktop Gadgets
  • Device Manager (1 item)
    Device Manager
  • Devices and Printers (9-11 items)
    Devices and Printers
    Note: I’ve also seen options for “Add a Bluetooth Device” and “Change Bluetooth Settings” on laptops.
  • Display (11 items)
    Display
  • Ease of Access Center (26 items)
    Ease of Access Center
  • Folder Options (5 items)
    Folder Options
  • Fonts (3 items)
    image
  • Getting Started (4 items)
    Getting Started
  • HomeGroup (2 items)
    HomeGroup
  • Indexing Options (1 item)
    Indexing Options
  • Internet Options (14 items)
    Internet Options
  • Keyboard (2 items)
    Keyboard
  • Location and Other Sensors (3 items)
    Location and Other Sensors
  • Mouse (8 items)
    Mouse
  • Network and Sharing Center (16 items)
    Network and Sharing Center
  • Notification Area Icons (6-7 items)
    Notification Area Icons
    Note: Laptops have a “Show or hide battery on the taskbar”
  • Parental Controls (1 item)
    Parental Controls
  • Performance Information and Tools (4 items)
    Performance Information and Tools
  • Personalization (12 items)
    Personalization
  • Phone and Modem (1 item)
    Phone and Modem
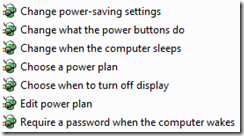
  • Power Options (7-8 items)
    Power Options
    Note: Laptops also show “Change battery settings”
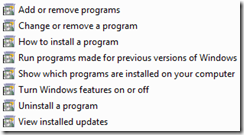
  • Programs and Features (8 items)
    Programs and Features
  • Recovery (1 item)
    Recovery
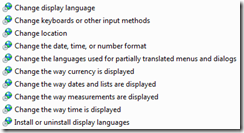
  • Region and Language (10 items)
    Region and Language
  • Remote App and Desktop Connections (1 item)
    Remote App and Desktop Connections
  • Sound (4 items)
    Sound
  • Speech Recognition (3 items)
    Speech Recognition
  • Sync Center (6 items)
    Sync Center
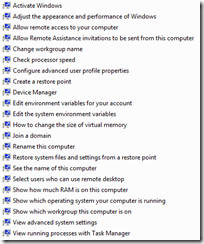
  • System (22 items)
    System
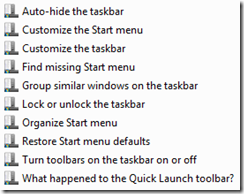
  • Taskbar and Start Menu (10 items)
    Taskbar and Start Menu
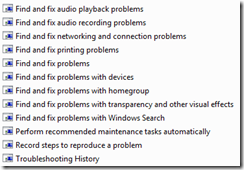
  • Troubleshooting (12 items)
    Troubleshooting
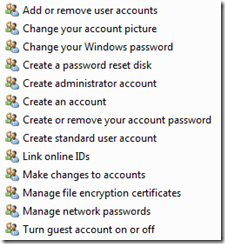
  • User Accounts (13 items)
    User Accounts
  • Windows CardSpace (1 item)
    Windows CardSpace
  • Windows Defender (1 item)
    Windows Defender
  • Windows Firewall (2 items)
    Windows Firewall
  • Windows Mobile Device Center (1 item – if you have it installed)
    Windows Mobile Device Center
  • Windows Update ( 2 items)
    Windows Update

Now you know why they call it ‘god mode’. 😉

VN:F [1.9.20_1166]
Rating: 10.0/10 (1 vote cast)

Exchange 2007 SP2 on SBS 2008

Exchange 2007 Microsoft has (finally) released the wrapper / installation tool for the Exchange 2007 SP2 install on SBS 2008 (and there was much rejoicing!) Previously, if you tried to install SP2 for Exchange on SBS 2008 you had to start messing with the registry per KB 973862. Thankfully, that’s no longer necessary with the installation tool. You can download it from the Microsoft download site.
 
Title: Microsoft Exchange Server 2007 SP2 Installation Tool for Windows SBS 2008
Date Published: 12/28/2009
Download size: 604 KB
File name: SBS2008-KB974271-ENU.msi
Download URL: Click here

Overview:
The Microsoft Exchange Server 2007 SP2 Installation Tool for Windows SBS 2008 provides a step-by-step wizard that simplifies the installation of Service Pack 2 for Microsoft Exchange Server 2007 on a computer that is running Windows SBS 2008. The wizard also detects and helps you repair some problems that are common during installation. Without this tool, Windows SBS 2008 administrators must follow a series of manual steps, which are outlined in the Microsoft Knowledge Base article You cannot install Exchange Server 2007 Service Pack 2 on a Windows Small Business Server 2008-based computer.

Installation, Step-by-Step:

First, downloaded Exchange 2007 SP2. Pack a lunch, because this baby is big (884 MB)! You can download SP2 here: http://www.microsoft.com/downloads/details.aspx?FamilyID=4C4BD2A3-5E50-42B0-8BBB-2CC9AFE3216A&displaylang=en 

Second, double-click the E2K7SPEN64.exe to extract it, but DON’T start the install of the service pack yet.
image

Once that’s done (and you’ve downloaded the Installation Tool above) the rest of the installation is almost ready to go. One more important note first.

Note: It goes without saying, but make sure you have a good backup of the server before applying any service packs. Seriously folks.

1. Run the MESIT installer, accept the EULA and click Next.
Accept the EULA - Next

2. Accept the default installation path and click Next.
Accept the default install location - Next

3. At the User Account Control prompt, click Continue.
User Account Control - Continue

4. Once installation of the wrapper is complete, the “Install Microsoft Exchange Server 2007 SP2 now” option should already be checked. Click Finish.
MESIT install complete - Finish

5. This will pop another UAC prompt, click Continue.
User Account Control - Continue

Note:

5a. You may be prompted to install the Windows Installer 4.5 available at http://go.microsoft.com/fwlink/?LinkId=151819 if so, click OK.
Error - You need to install the Microsoft Windows Installer 4.5 - OK
This will exit the SP2 install and you’ll need to download and install the Windows Update Standalone Installer 4.5 first. The download you need for SBS 2008 is file “Windows6.0-KB942288-v2-x64.msu” (2.94 MB).

5b. After downloading the installer, double-click it to run it, and if prompted by User Account Control, click Continue.
User Account Control - Continue

5c. The installer searches for updates,
Searching for updates 
and click OK when prompted to install Hotfix for Windows (KB942288).
Install Hotfix 942288 - OK

The installer runs by itself…
Installer runs by itself
… and will require a server restart when complete.

5d. Reboot your SBS 2008 server.
Installation complete - Reboot

5e. After the reboot is complete, log back into your server, click Start | Windows Small Business Server Tools | Microsoft Exchange Server 2007 SP2 Installation Tool to continue with the install and pickup at step 6 below.
Re-launch the MESIT

6. Browse to the location where you extracted the Exchange 2007 SP2 files and click OK.
Browse to expanded Exchange 2007 SP2 files 

7. At the “Install Service Pack 2 for Microsoft Exchange Server 2007” screen, click Next.
Here we go - Next

The wizard will temporarily disable Microsoft Forefront Security.
Under the covers magic

8. After the server environment has been prepared, click Next.
Prep complete - Next

The Installation Tool will pop up a dialog box telling you not to close the window (not that you could because Next, Cancel and the X are grayed out). Ignore this window.
Ignore this window until SP2 wizard is complete and closed

You want the 2nd window that pops up.

9. Click the Install Microsoft Exchange Service Pack 2 link.
SP2 Wizard - Install

There will be a short pause…
The waiting is the hardest part 
…and then the wizard will launch.

10. On the SP2 setup screen, click Next.
Introduction - Next

11. Accept the EULA, and click Next.
Accept the EULA - Next

12. After the readiness check is complete, (takes 1-2 minutes) if all of your prerequisites are green, click Upgrade.
Prerequisites OK - Upgrade

The service pack installation will go through several stages:

  • Organization Preparation (5 minutes)*
  • Preparing Setup (3 minutes)
  • Remove Exchange Files (21 minutes)
  • Preparing Files (1 minute)
  • Copy Exchange Files (8 minutes)
  • Hub Transport Role (9 minutes)
  • Client Access Role (3 minutes)
  • Mailbox Role (4 minutes)
  • Management Tools (1 minute)
  • Finalizing Setup (1 minutes)

Approximate time for SP2 install (excluding nearly 880 MB of downloads and reboots) was about 55 minutes, but YMMV.

*These times were on a virtual SBS 2008 install in a low-end Hyper-V server. AMD Athlon Dual Core Processor 4450B 1.22 GHz, 4 GB RAM. 

13. When the installation completes, click Finish.
SP2 installation complete - Finish 

14. Close the Exchange Server 2007 installation menu.
Close the SP2 wizard - Close

15. On the Installation Tool window, click Next.
MSIT - Next

…the wizard will re-enable Forefront and restore the default settings for the SBS Web services.
More SBS ninja in the background

16. If everything has gone smoothly, you’re out of the woods now. On the “Setup finished successfully” screen, click Finish.
MESIT is done - Finish

17. Start another backup of your server to protect all of your hard work! 🙂

VN:F [1.9.20_1166]
Rating: 0.0/10 (0 votes cast)

Download – Free Office 2010 First Look eBook

First Look Microsoft Office 2010 (eBook) Title: First Look: Microsoft Office 2010 
Author: Katherine Murray
Publisher: Microsoft Press
Date Published: © 2010 Microsoft Corporation
Pages: 202
File size: PDF 10.5 MB
Price: FREE
Download URL: Click here to download PDF

Description:

For a limited time, Microsoft is offering a free download of the eBook “First Look: Microsoft Office 2010” which provides an overview of the updated features in the newest version of Microsoft Office. The book is broken into 14 chapters (shown below) and further organized into three parts.

  • Part I – Envision the Possibilities (Chapters 1-3)
  • Part II – Hit the Ground Running (Chapters 4-11)
  • Part III – Next Steps with Office 2010 (Chapters 12-14)

Table of Contents:

  1. Welcome to Office 2010
  2. Express Yourself Effectively and Efficiently
  3. Collaborate in the Office and Around the World
     
  4. Create and Share Compelling Documents with Word 2010
  5. Create Smart Data Insights with Excel 2010
  6. Manage Rich Communications with Outlook 2010
  7. Produce Dynamic Presentations with PowerPoint 2010
  8. Organize, Store, and Share Ideas with OneNote 2010
  9. Collaborate Effectively with SharePoint Workspace 2010
  10. Create Effective Marketing Materials with Publisher 2010
  11. Make Sense of Your Data with Access 2010
     
  12. Putting It All Together
  13. Security in Office 2010
  14. Training Made Easy


Source: Eric Ligman’s blog

VN:F [1.9.20_1166]
Rating: 0.0/10 (0 votes cast)

Windows Black Screen Of Death (KSOD)

Black Screen Of Death (KSOD) The news rags are online pointing fingers about who is to blame for the latest Windows issue nicknamed the blacK Screen Of Death (KSOD). Microsoft says it’s not a patch issue, Prevx apologized for initially blaming a patch. All I know for sure is that people want it fixed.

Oddly enough, about 10 minutes after reading the news I got a call from a client about a workstation exhibiting similar problems:

  • No desktop icons
  • No taskbar or start menu
  • Solid background (no wallpaper)

I’m not 100% certain that this is the same issue in the KSOD reports in the news, but it sounds similar.

WHAT DIDN’T WORK FOR ME

  • Launching Explorer.exe from the Task Manager
  • System Restore

WHAT DID WORK FOR ME

  1. Rebooted the PC in normal mode and logged in as Administrator
  2. Ctrl-Alt-Del / Task Manager

    Launch Task Manager from Ctrl-Alt-Del
  3. File | New Task (Run)

    File / Run

  4. Click Browse and browse to:
    "C:\Program Files\Internet Explorer\iexplore.exe"
    Click OK

    "C:\Program Files\Internet Explorer\iexplore.exe"

  5. When Internet Explorer opened, went to the following URL and downloaded SuperAntiSpyware:
    http://www.superantispyware.com/ 
  6. Installed SuperAntiSpyware, ran a scan and it found the following results:

    Trojan.SVCHost/Fake

  7. I let SuperAntiSpyware remove that trojan, rebooted, logged back in and the desktop icons, start menu and taskbar were working again.


Here is the item that SuperAntiSpyware quarantined:

HKLM\SOFTWARE\Microsoft\Windows NT\CurrentVersion\Image File Execution Options\explorer.exe (Debugger – C:\Program Files\Microsoft Common\svchost.exe)

Again, I’m not saying for certain that this is the same issue others are reporting, but I wanted to pass  along what I found in case others see similar issues. This is what worked for me – your mileage may vary.

UPDATE 12/2/2009:
Here is the link to the Prevx KSOD cleanup tool (I haven’t tried it though):
http://www.prevx.com/blog/140/Black-Screen-woes-could-affect-millions-on-Windows–Vista-and-XP.html

VN:F [1.9.20_1166]
Rating: 0.0/10 (0 votes cast)

Training – Free SBS 2008 Hands-On Labs

image If you’ve been wishing for some structured Windows Small Business Server 2008 training offered by Microsoft, wait no more.  Microsoft has announced a set of four hands-on labs for SBS 2008, and (it gets better) it’s free!

Title: Windows SBS 2008 Hands-On Labs for Partners
Release Date: 9/25/2009
Version: 2.0
Download Size: 12.5 GB

The courses available are:

  1. Windows SBS 2008 Admin Console
  2. Windows SBS 2008 Working with Clients
  3. Windows SBS 2008 Installation
  4. Windows SBS 2008 Migration from SBS 2003

The downloads are available from the Microsoft Connect site:

URL: https://connect.microsoft.com/directory/
Invitation Code: SBSP-62B6-K3TH

System Requirements:

  • A machine that supports Hyper-V*;
        a server class** dual- or quad-core CPU is highly recommended
  • 5 GB of RAM min. (6-8 GB would be better);
        SBS 2008 requires a minimum of 4 GB of RAM, 
        Parent partition (Hyper-V host) requires 1 GB
  • 80 GB of free hard drive space;
        15 GB will be used initially but the VHDs could grow to a max. of 80 GB
  • Optional – router that will function between the SBS server and the Internet/corporate network
  • Optional – second physical network adapter to connect the SBS virtual machine to the router

Here’s a screen shot of the file downloads in the kit:

image

* Note: If you’ve never installed Hyper-V before, I’ve got a short video
(4:18 minutes) on YouTube demonstrating the installation.

** Server-class hardware is recommended, but not required since this is a HOL and not a production box. For example, here are my demo Hyper-V box specs:

  • HP Compaq dc5800 microtower
  • Intel Core 2 Duo E6550 2.33 GHz
  • 8 GB RAM
  • 1 ea. 149 GB SATA drive (OS)
  • 1 ea. 1 TB SATA drive (ISOs and VHDs)
  • Windows Server 2008 R2 Enterprise

To make sure that your machine supports Hyper-V (both in the BIOS and on the processor) check out the SecurAble download from GRC.com that tests hardware virtualization: http://www.grc.com/securable.htm

Props: Sean Daniel’s blog

VN:F [1.9.20_1166]
Rating: 0.0/10 (0 votes cast)

Nov 2009 KYSBSUG #69 – SBS 2008/Hyper-V

You’re invited to attend the November 2009 KYSBSUG meeting next week:

KYSBSUG logo Group: Kentucky Small Business Server User Group
(KYSBSUG)
Meeting #: 69
Date: Wednesday November 18, 2009
Start Time: 6:30 PM Eastern (GMT -5)
Location: Money Concepts
Address: 323 Townpark Circle, Suite 100, Louisville, KY 40243 USA
Map: Click here for map on Bing.com

Topic: SBS 2008 Build in Hyper-V
Presenters: Lee Johnson & Tim Barrett

Description:

This month we’re doing a live build of Windows Server 2008 R2 on physical hardware, installing the Hyper-V role, and then installing Windows Small Business Server 2008.

While the SBS build progresses we’ll also have another Hyper-V box on hand to show various operating systems, including Windows XP, Vista, Windows 7 & Ubuntu, plus some Hyper-V best practices.

We’re also bringing a copy of Beatrice Mulzer’s new book for you to check out:

Book - 70-653 Configuring Windows Small Business Server 2008MCTS Self-Paced Training Kit (Exam 70-653): Configuring Windows Small Business Server 2008
http://www.amazon.com/MCTS-Self-Paced-Training-Exam-70-653/dp/0735626782/

Registration URL: Registration is not required for this event.

VN:F [1.9.20_1166]
Rating: 0.0/10 (0 votes cast)