VN:F [1.9.20_1166]
SBS 2008 View All Mailbox Sizes
Do you miss the handy “Mailboxes” view from SBS 2003 that showed you how big the mailboxes are in Exchange 2003?
Unfortunately, the Exchange 2007 Management Console in SBS 2008 doesn’t come with that nice handy feature baked into the console. But you can still get that information using (gasp) PowerShell. It’s as easy as just copying and pasting.
- Click Start
- All Programs
- Microsoft Exchange Server 2007
- Exchange Management Shell
- Copy the following PowerShell cmdlet to your clipboard:
Get-MailboxStatistics | Sort-Object TotalItemSize -Descending | ft DisplayName,@{label="TotalItemSize(MB)";expression={$_.TotalItemSize.Value.ToMB()}},ItemCount
- And paste it into the Management Shell window:
- Then hit Enter.
That will give you an output similar to the following:
It’s basically the same info as SBS 2003/Exchange 2003, but not as pretty.
Source: TechNet Exchange Forum
Webcast – Hyper-V 101 with Wayne Small
This is one webcast you definitely don’t want to miss!
![Wayne Small [SBS-MVP] Wayne Small [SBS-MVP]](http://www.nogeekleftbehind.com/images/WebcastHyperV101withWayneSmall_13EC7/image_thumb.png) Title: “Third Thursday Webinar: Hyper-V 101”
Title: “Third Thursday Webinar: Hyper-V 101”
Presenter: Wayne Small [SBS-MVP]
Date: Thursday 04/15/2010
Time: 5:00 PM Eastern Daylight (GMT –4)
Host: Third Tier
Link to attend: Click here for Live Meeting
Description:
Wayne Small from Sydney Australia, Third Tier consultant and owner of SBSFAQ.com has been deploying Hyper-V based solutions to 80% of his clients. Hyper-V can be simple to deploy, yet powerful enough for high availability applications. It is also technology that your clients really don’t understand at all. So how does he sell it to them? Wayne will tell us how to get up and running, the impact this technology can have your business and how to sell the idea to your clients.
Have you heard all the hype about Hyper-V? Want to get your clients up and running on Hyper-V in an hour? Want to know the key things to look out for with Hyper-V and how to avoid the pitfalls? This session will run through all of the basics on Hyper-V as it relates to our SMB clients. It will cover the various flavors of Hyper-V available, what to use when and how to get your first Hyper-V client quoted, and installed. Wayne will walk through a typical scenario that he’s deployed in the past and how he’s addressed the clients concerns and taken advantage of Hyper-V to save the customer money, and increase their uptime.
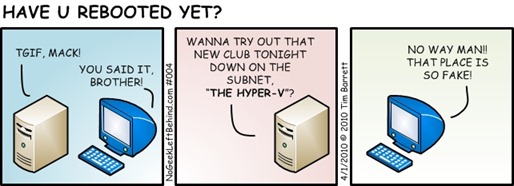
Have U Rebooted Yet – 004
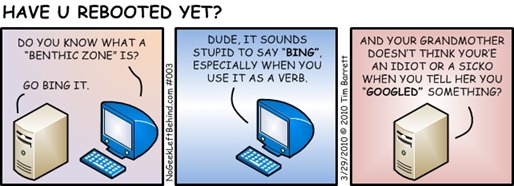
Have U Rebooted Yet – 003
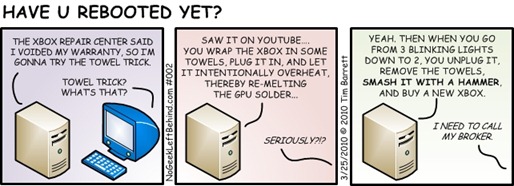
Have U Rebooted Yet – 002
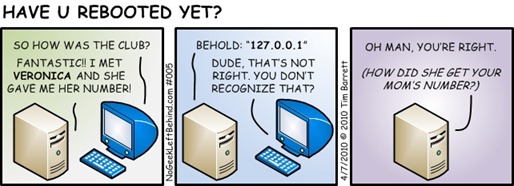
Have U Rebooted Yet
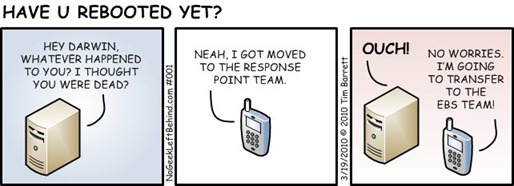
For a while, I’ve toyed with the idea of writing a geeky comic strip. I finally decided to take the notes I’ve been gathering and put them to use.
Below is the first one that I mocked up over the weekend. I’ve used Visio 2010 as the drawing tool, which is a breeze. I can’t promise the comic will be funny, but anyone who knows me personally doesn’t need that disclaimer. Enjoy!
Two KYSBSUG Events in March, 2010
It’s been a busy month in Louisville already with TechNet and MSDN here last week on March 4, 2010. And we’ve got some more stuff coming your way:
**First March 2010 Meeting**  6-YEAR KYSBSUG ANNIVERSARY
Date: Wednesday March 17, 2010
Time: 5:30 – 7:30 PM Eastern (or whenever everybody leaves)
Venue: Howl At The Moon
Address: 4th Street Live, Louisville, KY
URL: Click here
Parking: 423 South 5th Street
(Usually $3-$5, or free after 6PM)
Door Prizes: There are no door prizes for this meeting, but there are lots of low/no cost stuff to enjoy
- Free cover charge for KYSBSUG attendees
- Free buffet 5:30 – 7:30 PM
- Attendees receive first two drinks for $0.50 / each (well drinks, long island teas, domestic beer, house wines, house margaritas, DeKuyper cordials)
- ½ off all drinks until 9 PM
Registration for this event is NOT required for this event, but you must be over 21 to enter the venue.
**Second March 2010 Meeting**  KYSBSUG Meeting #73 – Windows Server 2008 R2 IT Pro Tour
Presenter: Matt Hester, Microsoft TechNet Presenter (in person)
Date: Monday March 29, 2010
Time: 6:30 – 8:30 PM Eastern
Venue: Money Concepts
Address: 323 Townepark Circle, Louisville, KY 40243
Registration: We will be providing dinner and door prizes, so registration IS required.
Registration URL: Click here
Description:
Here’s your chance to connect with your local IT Pro Community AND meet Matt Hester, your local IT Professional Evangelist! Now that the dust has settled and the boxes are mostly unpacked from Matt’s relocation to Ohio. He wants to meet you and get to know you! What a better way than with Windows Server® 2008 R2, giveaways and food!!
Matt Hester will be talking about the many administrative benefits of Windows Server® 2008 R2, including improvements to Active Directory, PowerShell, Group Policy and much more. He will also talk about his experiences with his recently published book Microsoft Windows Server 2008 R2 Administration Instant Reference. Ultimately, this evening is for you – so bring your questions, prepare to have some fun and expect to learn more about Windows Server® 2008 R2. This should be a fun and exciting evening!
Matt will have a couple copies of his book to give away and other fun stuff. Be sure to attend and learn more of what Windows Server® 2008 R2 has to offer!
This is your chance to give feedback on how Matt and Microsoft can help your local community efforts. We hope you’ll join us for an evening of fun and peer-to-peer networking with your local IT Pro Community!
Special Thanks:
We’d like to thank the folks that helped bring this month together.
- Jeff Slyn of SLYN Systems & Peripherals for doing an AWESOME job once again of pulling together the venue and specials for the first meeting on the 17th.
- Mallory Sizemore from Howl At The Moon for hosting our meeting on the 17th.
- Matt Hester of Microsoft for coming to Louisville for the second meeting to present and for providing dinner on the 29th.
- Lee Johnson of Sentry Computer Systems for hosting us at Money Concepts again on the 29th.
I hope to see many of you this month as we wrap up our 6th year of free monthly meetings, and jump right into our 7th year! 🙂
Amazon Kindle 2 – From an SBS Geek Perspective
 I have a lot of reading to do and I need to plow through an average of 40-80 pages from books on a daily basis. (That excludes 180-220 emails per day, blogs and websites). I don’t know if that number is high or low by your standards, but I find that each year the amount of reading I need to do always goes up.
Now, even though I’m a geek, I don’t want to be a nerd. And carrying a fake book around is getting pretty deep into nerd territory. But i figure that with features like playing MP3s and cellular wireless, that swings me back over to the geek camp. So, after an inordinate amount of online research, I purchased a Kindle 2 from Amazon.com. I picked the Kindle 2 model over the Kindle DX for several reasons.
My considerations for which Kindle to purchase:
Note: My winner for each category is shown in the far right column, and the spec I like best is highlighted in under each Kindle. Keep in mind that this is based on my research, not official Amazon specs / info.
Also: You can click on any picture for a larger view.
SPECS
Kindle 2  |
Kindle DX  |
Winner | |
| Weight | 10.2 oz. | 18.9 oz. | K2 – 46% lighter |
| Overall size | 8” x 5.3” | 10.4” x 7.2” | K2 – 25% smaller |
| Screen size | 6” | 9.7” | DX – 2.5 x bigger |
| Resolution | 800×600 @167ppi | 1200×824 @150 ppi | N/A |
| Max # books | 1,500 | 3,500 | DX – 2,000 more |
| Storage | 2 GB, 1.4 usable | 4 GB, 3.3 usable | DX – 1.9 GB more |
| Battery life | Up to 1 week | Up to 1 week | N/A |
| Free Wireless | Yes | Yes | N/A |
| Free Case | No | No | N/A |
| Price | $259 US | $489 US | DX – 47% cheaper |
GOOD – The DX has 2x the screen & 2x the storage.
BAD – The DX has nearly 2x the weight and 2x the cost.
WINNER – At half the price and half the weight, I opted to buy the Kindle 2.
OK, so all that looks good on paper, but what about the real test? How does this really look and feel? Let’s look at some key categories.
SIZE
As I mentioned in a previous post, I hate hauling around bulky or unnecessary items. When it comes to packing your toolkit or travel bag, size matters. Here is the K2 next to some everyday items for perspective: 4GB Zune, dollar bill, K2 & Matt’s new book. (The Kindle 2 is shown in the optional case)
The K2 is definitely smaller than a standard geek book, not as wide as a dollar bill, slightly thicker than a Zune, & a lot thinner than my Palm Treo Pro phone (not shown).
READABILITY
In spite of the resolution and poor focus of my camera phone, you have to see the screen to believe it.
When I unboxed the Kindle 2, I thought there was a sticker on it, but that was the actual screen.
Other than the background having a gray tinge to it (rather than a true white) it looks like a real printed page. For me the gray was a bit distracting at first, but I’m already used to it. The picture above is showing my website, not an eBook. The camera phone doesn’t do the Kindle justice. This is a VERY impressive screen.
GLARE
Though contrary to popular belief, geeks do go outside in the sun for things other than driving to a customer site to fix a computer. Here is the Kindle 2 outside at noon with the sun behind me as I took the picture.
That’s full daylight, no clouds, with the sun shining right on it.
If you try to use the Kindle as a mirror, it is possible to get a flare on the screen, but I really had to aim just right to get this much glare.
Just a slight shift and the sun spot was gone. Readability outside is as-good, if not better than indoors.
WEB BROWSING
The Kindle is designed to access the web, not to surf it. The screen shots above show that you can indeed surf the web though and read blogs and such. Just don’t expect a desktop PC web experience.
READING PDF DOCUMENTS
One of the killer features for me (and pretty much the primary reason I bought the Kindle) was the native ability for the Kindle 2 to read PDF documents. You just plug in your USB / charging cable and the Kindle shows up in Windows Explorer like a USB drive.
Drag-and-drop, you’re done. I have gobs of Microsoft Press books that include a CD in the back with a PDF version of the book. You can just plug in the Kindle, insert the CD, and drag and drop the PDF into the Kindle.
GOOD – All the PDF documents I tested rendered accurately on the Kindle.
BAD – Many PDFs are smaller on the 6” screen than they would be in real life, making them harder to read. And the cool font size changing feature doesn’t work on PDFs as far as I can tell.
MORE GOOD – Even though the text is smaller, I was able to search PDFs, bookmark them, and the Kindle remembered which page I left off reading.
MORE BAD – I couldn’t add notes or highlights to a PDF like I could with a ‘real’ kindle book.
Small fonts aside on PDFs, this feature still rocks.
FILE CONVERSION
The drag and drop on the Kindle 2 means I didn’t even have to email the document to Amazon for conversion like the Kindle 1. I did send a PDF to “name”@free.kindle.com (the way to convert files to the Kindle AZW format without the $0.15/MB wireless fee), but that has a file limit of 5 MB.
For a test I took the 1.92 MB “Windows Server 2008 Technical Overview.pdf” file and sent it to Amazon for conversion. It came back to me in under 2 minutes as an AZW file that only weighed 5.4 KB. I pulled the AZW file into the Kindle 2 and it was just my sig line from the e-mail. A few seconds later another email came in from Amazon with an attached PDF but now it was called “Windows_Server_2008_Technical_Overview.pdf” and was the exact same size as the original. It still doesn’t change font sizes in the Kindle, but it works the same as before the ‘conversion’. I suspect I’ll be spending a lot of time learning the ins and outs of file conversion because I’d like to be able to shrink and grow the text if possible on a PDF.
OPTIONS
The only option I recommend (other than a warranty if you’re the fumblefingers type) is the Amazon Kindle Black Leather Cover.
At $39.99 US, it’s not cheap by any stretch, but then again it’s not cheaply made either. It fits like a glove, and it still gives you access to the important bits for charging and such. I wonder how long the elastic band / strap will last. Still, I think that the leather cover is a must-have.
VERDICT
So far I’m a very happy camper. This is the best (and most fun) technical purchase I’ve made since I got my Acer Aspire One netbook. The Kindle 2 can do text-to-speech and there’s supposed to be experimental support for MP3s, but I don’t care about that. This is a great device as-is.
How To Create a Bootable ShadowProtect USB Drive
 I really hate carrying around physical CDs/DVDs for programs I use a lot. Normally I just convert all my discs into ISOs with the free ImgBurn program (which totally rocks) and then throw the ISOs onto my Toshiba 320 GB portable USB drive. Then when I’m on-site if I need a CD, I just mount the ISO with Virtual CloneDrive (also free, and also rocks) and launch the program.
That said, sometimes you still need a bootable CD/DVD. For instance, when you want to image a workstation or server with StorageCraft ShadowProtect and backup the entire machine to an external USB drive. Unfortunately, that means carrying the disc with you in your tech toolkit, or carrying the ISO and burning a disc.
Here’s a better idea – Use one of those old 1 GB USB flash drives gathering dust in your drawer, and turn it into a bootable USB drive.
Now, before you say “not BartPE and the HP Boot Flash Utility again”, we’re not using those old school tools. This is as modern as modern gets – using a Windows 7 64-bit ultimate machine and no physical CDs.
Note: These instructions are assuming you have already purchased a licensed copy of ShadowProtect from StorageCraft, and are simply looking to turn a boot CD into a boot USB flash drive.
What You’ll Need
- ISO image of ShadowProtect or a ShadowProtect boot CD (471 MB)
- 1 GB or larger USB flash drive
- PeToUSB_3.0.0.7.zip (100KB)
- Windows 7 workstation (I used a 64-bit Ultimate box, but YMMV)
Step-by-Step Instructions to Create the Bootable USB Drive
- Extract the downloaded PeToUSB_3.0.0.7.zip file into a folder on your desktop. You will see 3 files in there, but you only need PeToUSB.exe

- Insert the physical ShadowProtect CD into your drive, or if you’re using an ISO, mount the ISO using Virtual CloneDrive (or some other ISO program).

- Insert your USB flash drive.

- Right-click the PeToUSB program, and choose RunAs Administrator.

- Select your flash drive from the pull-down menu.

- Check Enable Disk Format and check Quick Format boxes.

- Browse to the ShadowProtect CD location.

- Click the Enable File Copy checkbox.

- Click Start. On the Continue screen click Yes.

- On the Are You Sure You Want To Continue screen, confirm that the correct flash drive is about to be formatted, and click Yes.

- The drive will be automatically formatted and the files will start copying.

- When the format and copy are complete click OK.

- Safely Remove the drive, you’re done!
Now you can boot a workstation off the USB, plug in a USB drive large enough to hold the backup images, and create a backup of that target machine. Or, for some P2V action, you can use the free VMware Player (89.9 MB) to spin up that SPF as a virtual machine.

